
Apple Photos trifecta of storage eating features
/Apple Photos has a trifecta of features – Live Photos, Burst Mode and HDR, that while offering some convenience and perks, really are part of a strategy that long-term results in massive subscription fees from ever-expanding iCloud accounts. OK, that sounds pretty paranoid, but it’s essentially true.

Apple has released these cool features over the years, which can unquestionably elicit a few oohs and aahs, but ultimately eats up enormous amounts of storage space while the unaware user has no idea why it’s happening. When you think about the relatively short period of time that iPhones, and in particular these features, have been around, it is staggering to think what 10 years, 20 years and more will bring in terms of these growing storage eating features that keep getting rolled out.
I have been organizing many people’s photo collections over the past few years and the numbers I have seen has caused me to have some concern, not just about what my client’s have accumulated so far, but about what they will accumulate in the future.
Burst Mode
Starting with the iPhone 5s, you could shoot 10 frames per second, up to 30 fps if you used a 3rd party app to enhance it. Why in the world you would need to is beyond me, perhaps if you are covering the Kentucky Derby for Sports Illustrated. But I constantly see dozens of virtually the same photo, usually a simple portrait or snapshot of the kids or family looking directly at the camera. It’s just too easy to simply hold down the Capture button and knock off 10 - 20 or more images at a time.
Not only does this eat up storage but what are the chances that someone is going to sit down and edit for the good ones, carefully scrutinizing each similar in that series for the subtle nuances of facial expressions that separate them from its lesser cousins. Not much! Now multiply that by a few dozen times a year and you have the typical digital photo collection.
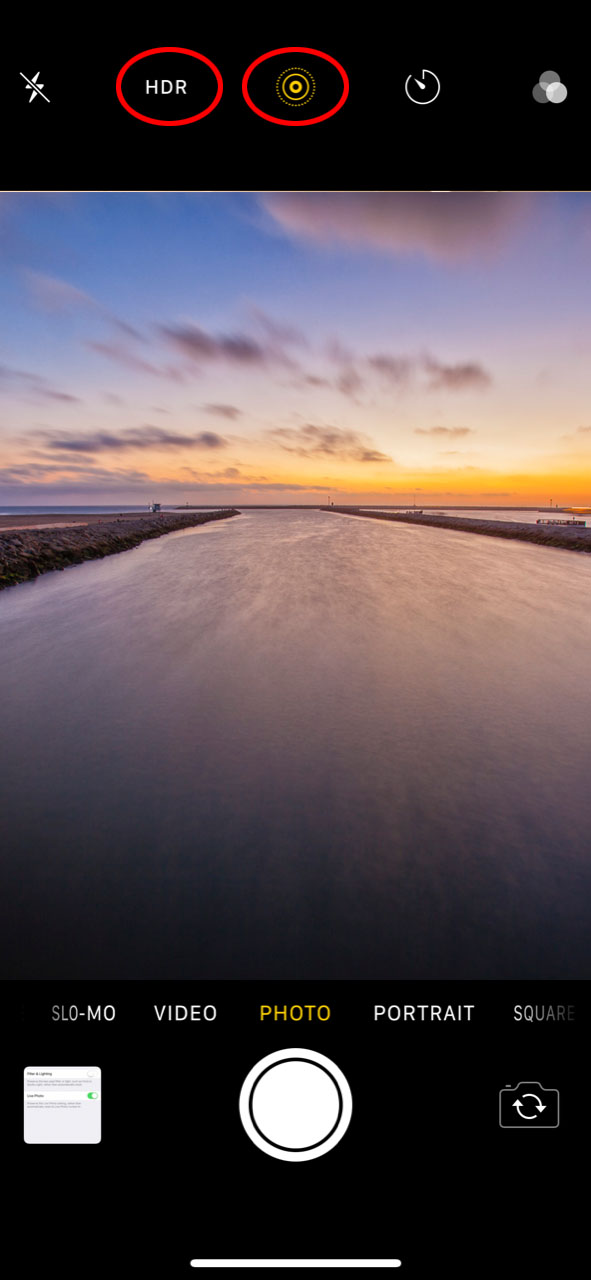
HDR and Live Photo options on your camera screen
HDR
HDR, which stands for High Dynamic Range imaging, is a popular photographic technique used to create images from a variety of exposures of the same image. It essentially combines a lighter version, a normal version and a darker version of the exact same image to produce one image that has the best parts of each exposure. It tries to be the perfect exposure, perhaps closer to what we would normally see with our own eyes, which has the capability of viewing a greater dynamic range than a camera.
Now HDR is hardly the worst culprit as far as eating up space, but if you don’t have the setting right, it will produce an HDR version of the image and a non-HDR version of the same photo, and voilà, an instant dupe of every image you take. Do you know which one you like better? Do you take the time to check? More clutter!
Live Photos
Live Photos is by far the shiniest toy in the Apple Photos arsenal and its gimmickiness can make it fun to play and experiment with, it can also suck up literally gigabytes of storage without you being aware of it.
Live Photos takes a short video of 1.5 seconds before and 1.5 seconds after you click the shutter release, a total of a 3 second video to accompany the Jpeg you shot. This allows the user to not only view the scene as it unfolds and continues, but if you have the patience, you can go in and edit it so that the final image can be extracted from any point in that 3-second sequence. If you notice, the key word here is patience.
Yes it’s cool, very techy and quite a novel way to see your photos, but the novelty will wear off, because after a while, quite frankly who cares about all those 3 seconds and you will be stuck with a massive archive of 3 second videos of all your images and all the storage it will suck up.
And as for editing for the best of those 3 seconds, really, ask yourself how many times you are going to do that. Probably as much as you go in and edit down those Burst mode series you’ve been accumulating.
So what to do?

Preserve your choices in Camera Settings
Burst Mode is easy, don’t use it unless you are really taking an action shot. If your subject is not doing anything, maybe just posing or smiling at the camera, just take a few shots one at a time. Remember as long as you hold down the Capture button, it will continue to take pictures and you will see the tally mount as you keep pressing the Capture button.
HDR can be a good option to use, but you don’t have to save both the original and the HDR version. My suggestion is to shoot a bunch of photos with HDR turned on and compare the HDR versions with their Original counterparts. Then decide if you want to continue to use HDR or not, and if you want to keep both versions. You will see the HDR option when viewing in Camera Mode. To not save both versions, go to Settings> Camera >HDR and turn off Keep Normal Photo.
Live Photos is turned on by default so if you haven’t turned it off, you have been shooting in Live Photos mode. To turn it off, in camera Mode, look for the Live Photos icon which is three concentric rings, it will be highlighted in yellow if it’s turned on.
NOTE. Here is the important thing to know if you are turning HDR or Live Photos on or off. To avoid having to turn on/off the feature each time you use the camera, you want to set things the way you want and then go to Camera settings and lock in your choices.
Go to Settings > Camera > Preserve Settings. You can do this with any of the settings on your camera, for instance if you always want to shoot video or square format, you can set it to preserve those settings going forward as well.
All these features can be fun to play with and offer a lot of options when taking your pictures, just make sure you understand how they work and what they do. Be in control and you won’t get any surprises later on.